The French Under Braid Hair Style!

Hello all you awesome people out there! Hope you're having a great Sunday so far! So today I'll be showing you guys how to do a French under braid, (the name is still a work in progress) I randomly made up this style in my boredom one day and it is a style I do a lot on my dolls. Are you ready to get started? Then let's go!
You will need...

* A doll
I will be working with sweet little Kirsten because her hair is long and easy to work with.

* Brush
Ok guys, I don't use an AG brush. If you have one then go ahead and use it. The only reason I trust a non AG brush is because it has stiff bristles and I don't use it in my hair.

* Hair bands
I always keep extra with me when I do hair incase one brakes. I like to use the rubber bands for making loom bracelets.

* A pair of hands
Guys, I can't tell you how helpful these are, especially for this hair style.

*Optional, spray bottle
This just depends on if you like to mist your dolls hair or not, just make sure your not drowning your dolls hair with water. If you have a Madame Alexander doll then do NOT use water.

*Optional, random hair things
If you want you can use bows, flowers, or hair clips in your finished braid. I'm using little butterfly clips from Dollar Tree.
Ok, let's get started!

If you decided to use the spray bottle then you can start lightly misting your doll's hair. Don't get water in your doll's eyes! It could cause your doll to get silver eye, it could also make her eyes rust. We don't need any rusty eyeballs so just cover her eyes with one of those trusty hands. Then brush her hair starting from the bottom and working your way up.


Take front section of hair and separate it into three pieces, then braid three times.

One,

Two,
Three.

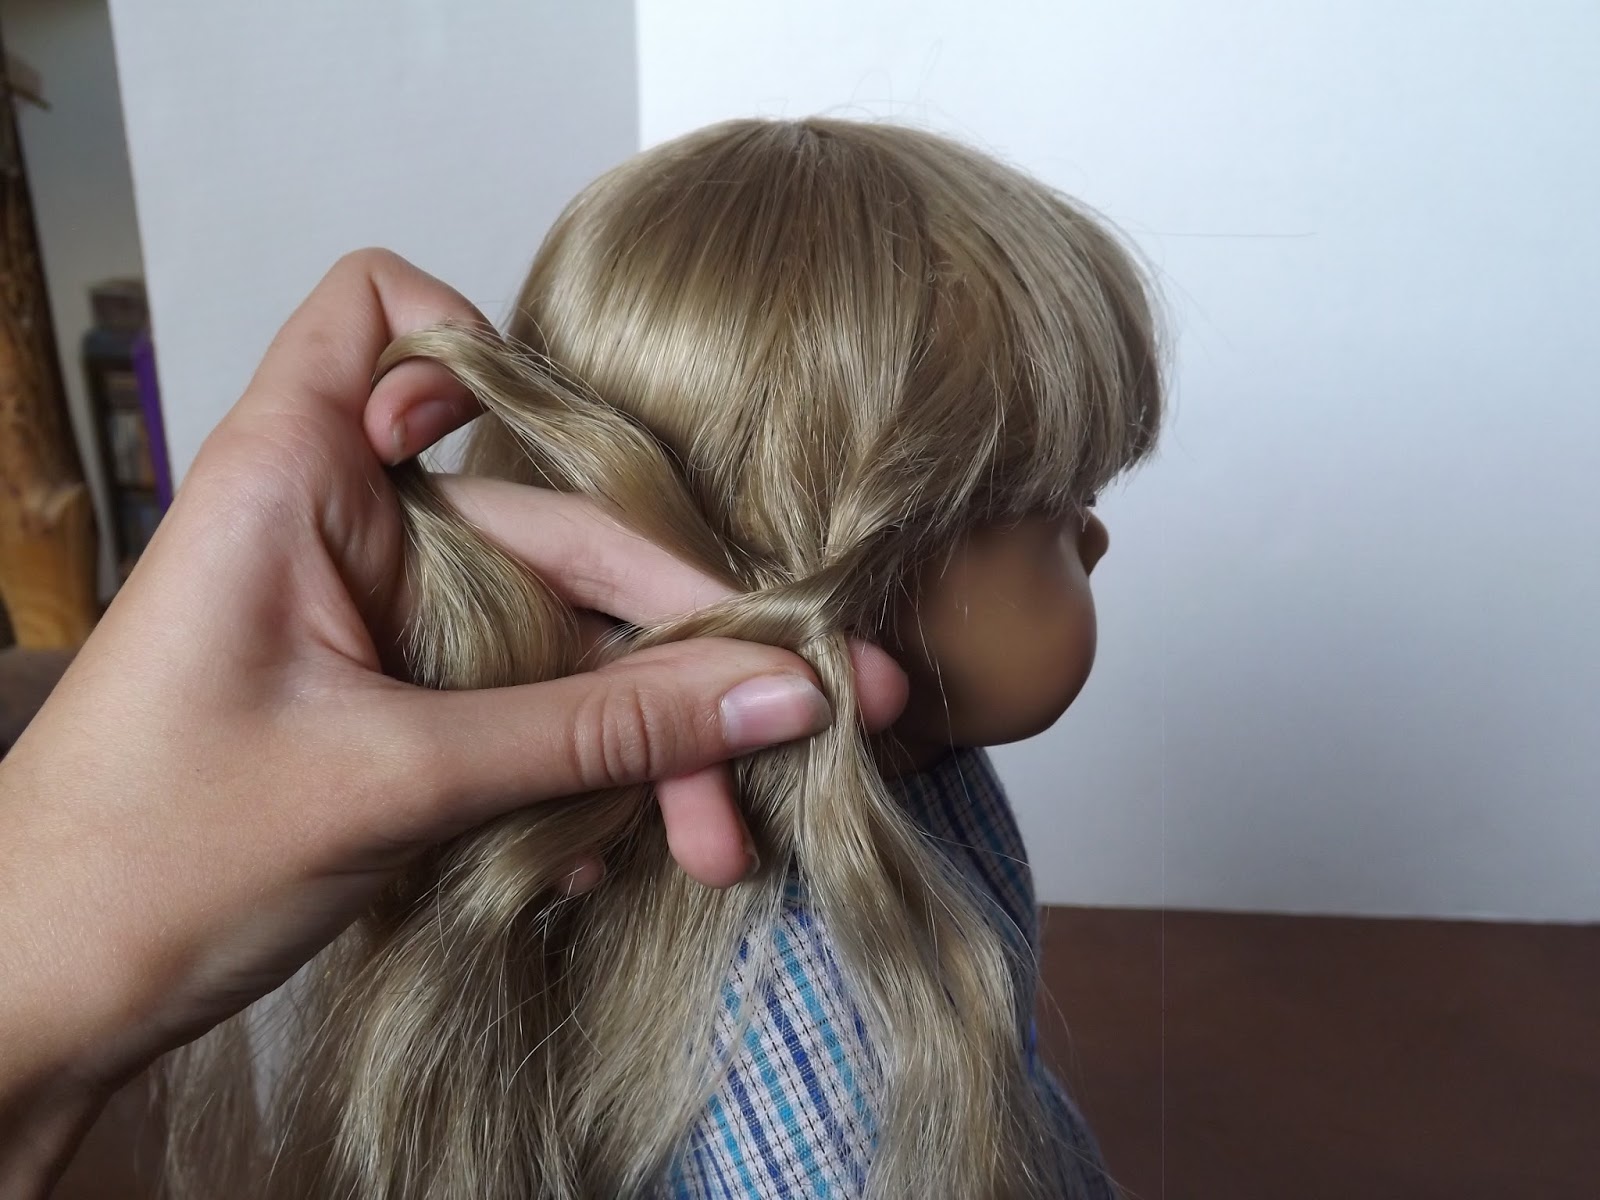
Now take some of the hair that we didn't use yet and take three small sections from there,

Take a section for the right, then the center, then the left.

Now braid three times traveling under the head.

One,

Two,

Three.

Try to keep the braid close to your doll's head, but don't pull it too tight! Continue picking up and braiding until you only have a small section left.

Divide up the piece into three sections and start braiding down.

Once you get to the end use a hair band to tie it off.

And there you have it! Doesn't she look nice?


Last thing I'll do is put a cute little butterfly clip in her hair and she's done!

I think Kirsten likes her new do, I hope your doll likes it just as much. If you have any questions then feel free to ask! I hope you have an awesome day!
- Katie :)


Awww! That is a really nice hairstyle! If you have a princess dress it would look really sweet together!
ReplyDeleteThanks! That would be really pretty! I like that idea!
Delete- Katie :)
WOW! Great hairstyle and tutorial! I love that you said "A pair of hands
ReplyDeleteGuys, I can't tell you how helpful these are, especially for this hair style." HAHA! Nice job Katie!
I love that there is at least a little bit of humor in all your posts. (-;
-Jewel
http://www.dollnotebook.com/blogs/
Thanks! I'm so happy you liked it :) LOL Yay! I'm glad you thought it was funny, I try my best to make posts fun and enjoyable to read :D Thanks Jewel!
Delete- Katie :)
Yes, I also find hands useful for an assortment of daily activities. XD I love this style. It reminds me of Katniss' iconic braid!
ReplyDelete~ The Human
herbookofcourse.wordpress.com
IKR? You can use them for sorts of things.... You can use them for petting cats, turning pages in a book, and making Christmas cookies! XD Thank you! Oh cool!
Delete- Katie :)